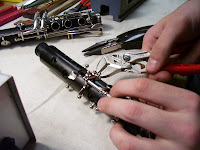
I began by measuring the venting and cork thicknesses already in place on the clarinet, filling out a paper on what I intend to install. This was to make it easier later once I began the corking stage.
Next I removed all of the keys, chem flushed them in both simple green to remove organics, and phosphoric acid to remove corrosion. Each hinge rod was straightened and cleaned, while the hinge tubes were swabbed out with pipe cleaners.
 Before replacing the keys, I repaired any issues in the body. Once of these issues was to re-align a post that was causing a key to bind. I used an induction heater to melt the plastic so the post could be removed. The post was pulled and the hole enlarged. The post was then epoxied back in place and the hinge rod installed so that the post aligned itself.
  Another body issue was a cracked tone hole. Because of the crack was not too sever, the hole was plugged and the crack filled with layers of super glue. As the glue dried, it could be manipulated much like the plastic so that the tone hole could be leveled.
Once the body had been repaired, I began to fit the keys. Keys were checked for both lateral and end play to ensure a perfect fit with no binding or slop. By doing this, we ensure that the key cannot move and jeopardize the sealing of the pad.
While padding, I found some issues with the tone holes. Using a set of custom tone hole levelers made by the school, I leveled the various holes on the clarinet that were giving me problems and the pads were sealed.
 After the tone holes were leveled, the padding could be finished and the keys were then removed again. All of the corks were cemented in place and sanded to fit the body, simultaneously setting the lost motion and the venting of each pad.
Once the padding and corking was finished, I moved onto tenon corking. There was one issue with the fit of a socket. Fitting too tight, it had to be shaved with a socket reamer. Once it was fit, the corks were installed and sanded to fit.
With the tenon corking complete, the keys were then removed once more and the body was finished. First with black buffing compound, then with a mild degreaser. Each key was cleaned again and installed. The clarinet is now finished.
With a quick cleaning of the case, the clarinet was put back inside until next semester when we will revisit them briefly for any minor tune-ups and key oiling. After that, it will be ready to return to the customer. For more information, leave a comment or email me at airbandrepair@gmail.com.


