The Shop

The Shop
My name is Jake Rendell. This blog is a description of the various skills and information that I have learned and will learn while studying at Minnesota State Southeast Technical, in the Band Instrument Repair Program. Before coming to study in the BIR Program, I graduated cum laude from Laurentian University with a B.A. Music - Vocal in 2010, and First Class Standing with a B.Ed. I/S Music from Lakehead University in 2011. This final certification from MSC-ST will finish in May of 2012. I will try to update this blog on a weekly basis.

Week 17 - December 12th - 14th

 The final week is finally here. These last three days have been a flurry of flute work. After a weekend of padding, there was not that much left to do. So here it is. First off, I had to pad the trill keys and the upper C key. These pads are very much like the pads on a clarinet. They are floated in with glue and leveled. After all of the pads are leveled, we bake a seat in the pads using a bit of water and a mail-box oven. 
 While the pads were setting, I turned my attention to the head joint. There was a bit of silver plate peeling from the inside, so before I replaced the head cork, I quickly buffed the inside of the tube with black rouge on the lathe. We use the lathe because the speeds on the buffing machine or our bench motors are much too high and may damage the plating on the inside. So at a low speed, we use a rag and a dowel to spin it clean.
 After it was all cleaned up, I installed the head cork. Using a sleeve, I cut the cork down to 1 inch in length to provide a better sound for the nickle silver head joint. I then sanded a slight taper into the cork to get the proper fit. Finally, I sealed the cork with paraffin wax and installed it. The crown was tightened up and the head joint is almost ready to go.
The pads are still setting up at this point, so I began to work on fitting the tenons. Normally, we would do this before padding, but with only one head joint expander and 22 students, I figured I would wait for a bit. The sockets and tenons were rounded out and the tenons were expanded slightly to fit snug. After that, the pads were set and we move to corking. 
 Corking and regulating the flute is slightly different than the clarinet. Because there is no lost motion on the flute, there is a specific order in which you must regulate then vent the stacks. But it all involves sanding. Protecting the body with blue tape, I used 320 grit sand paper to shape the corks and set the venting of each key. Fun stuff.
 Finally, the flute is finished. I gave it a quick polish with silver cloth and play tested it. There was one issue with the G# key getting bent which caused it not to close properly. Totally my fault, but an easy enough fix. So after bending it back, then fixing the issue that caused me to bend it in the first place, then re-straightening the hinge rod and key because I bent it while bending it to fix it... the flute was re-play tested. Having passed this time, the case was cleaned and the paperwork filled out. Having fulfilled my duties here for the year, I make my way back to Canada in the morning for a 3 week vacation. Merry Christmas to all and I will see you in the new year.


Week 16 - December 5th - 9th

It's all hands on deck this week as we draw closer to the end of this semester, and to our flute deadline. I began this week by giving my project flute a bath, both in simple green and then phosphoric acid. Normally on a silver-plated flute like this, it would be followed by a rinse in silver dip, but I have some body work to do before I finish the dip. All of the rods, screws and pins were pulled and everything was wiped down. 
 After cleaning, I dove into some much needed body work. In particular, two of the ribs had to be re-soldered. It looks like this flute took a pretty hard hit at some point because a few of the keys have some pretty nasty bends and the ribs had been ripped away. After refitting the ribs with a brass bit that I shaped to fit around the posts, the ribs were tied down into place with binding wire and soldered with lead-free soft solder. Once this was done, the flute was silver dipped. 

 On to key fitting now. Key fitting on a flute is very similar to fitting a clarinet. There are hinge rods and tubes that get bent in the same way. One problem that occurred was wearing on the C/Bb/A hinge rod. This particular rod has two different functions on the flute. It acts as a hinge rod for the C key and as a pointed pivot screw for the Bb and A. In this case, the wearing was on the pivot screw portion. On most student flutes this wouldn't be a problem because, acting like a headless screw, you can simply tighten the screw to remove play. In this case, the rod is a little better made and is designed to butt up against the post, allowing for it to tighten like a headed screw. As a result, the shoulder of the rod had to be filed to fit to remove the play. This isn't a big issue, just an interesting one.
 Continuing with key fitting, I found a major issue on the foot joint of the flute where the rib had to be re-soldered. There was a large amount of end play on the C key, to big to compensate through swedging or plastic shims. In order to fix this, I made a washer out of nickle silver on the lathe. I first had to square the face of the post and the ends of the hinge rod. I then turned a stock rod down to the diameter of the hinge tube, and turned a recess into it to the diameter of the hinge rod. I then faced the exposed nub to the exact width of washer that I needed. Using a drill bit the size of the hinge rod, I drilled into the center of the stock. Once the bit hit the recess, the washer was cut off and exactly the size I needed. The burrs were removed and it was a perfect fit. 
After all the key fitting was done, I disassembled the flute and polished everything with silver polish. The flute is now ready for padding. After all of the work is done, the flute will be re-polished using a polishing cloth rather than paste, leaving the flute free of compound and finger prints. 
It is now the weekend and the late night padding sessions have begun. Yesterday (Saturday) I managed to get my foot-joint padded with much difficulty. Thanks to metal memory, every time I leveled the C key, it would simply move back after 10 minutes or so. In addition, Artley's pad-cup design is absolutely terrible and has a small ring protruding right in the middle of the shim radius. But I continue onto the body today with a jug of orange juice and Hootie and the Blowfish playing on Pandora. The sooner I finish, the sooner I return to Canada for the holidays. 

Week 15 - November 28th - December 2nd

Welcome back to the Woodwind Lab. After a 5 day weekend, we dive right back into the world of flutes. This week we look at regulation, venting and lost motion, padding, and knock-pins. It was an exciting, yet frustrating week.

Beginning with the easy stuff, we look at regulation. Unlike the clarinet, many regulated keys on the flute come with regulation screws, making it very easy to control and adjust. We must take care of regulation before looking at venting and lost motion. So after regulating everything, we corked the keys and set the venting, simultaneously removing lost motion. After repeating these procedures over and over, we move on to the more challenging stuff.

As a mini-side project, I was asked to take a quick look at a customer flute that just came in. I checked for any mechanical issues, replaced a couple of corks, cleaned and oiled the keys. This was my first experience with knock-pins. These pins hold specific keys in place on hinge rods and allow for regulation. They are tiny tapered pins that are ground very close to the keys. They are not difficult to work with, but after taking a few out I found that I had to replace one. Exciting stuff.

Towards the end of the week, we dove into padding. Padding on a flute is not like padding on a clarinet. We do not level the tone holes on a flute and the pads are not glued in (in most cases). Rather, the pads are held in place with a small screw and we will shim the back of the pad to conform to any issues in the tone hole, providing a proper seal. While this may sound pretty basic, it is not exactly the easiest thing to just pick up and go. The shims that we use are precise to the thousandths of an inch. To measure the gaps in the seal, we made an entire set of Mylar feeler-gauges. Using these gauges, we determine the size of the leak, where it is, and how we can shim it. Easier said than done.
Finally, at the end of Friday, we received our project flutes. I received a 1960 Artley student line flute, very similar to the flute that I was already practicing on, but in much worse shape. I brought it home over the weekend and did a quick inspection. Keys are bent, pads are torn, plating is missing, dents are present and hinge-tubes are full of play. There is lots of work to be done and only two weeks to do it. Having set up a work bench at home, I fear there will be many late nights spent padding in the near future.

Week 14 - November 21st and 22nd

This week was a short week here in Red Wing. Thanks to school meetings and Thanksgiving Holidays, we were in school for a total of two days. We used one of these days to have some fun on the lathe.

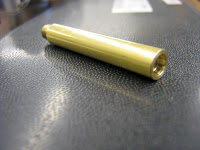
This week we made some tuba valve stems from scratch. We began with a 1/4" brass stock, turning it to length and threading one end. To ensure proper piston function and porting, the length of the stem body had to be precise. The stem was faced down to a specific length and drilled out. Finally, the stem was tapped, cleaned, and tested with its corresponding valve button.


 In preparation for working on flutes, we made a flute screw board. The pattern was pasted onto a block of pine and holes were drilled out. Nothing fancy, but it works quite well. To end off the week, we were given flutes to practice nomenclature and maintenance on. This flute is an Artley student level flute. With a five day weekend ahead, we dive into the flute world next week.


As a last note, I have posted a page dedicated to the process of the Armstrong project clarinet. For more information, leave a comment or email me at airbandrepair@gmail.com.