This week in the brass lab, we draw ever closer to finishing our French Horns. After the basics of cleaning and dent work, I've gotten into the more detailed work in making the horn playable, including refitting rotors, repairing solder joints and plating keys.
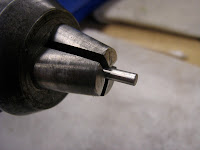
I began with repairing a bent rotor stem. To do this, I first made a bit to hold the rotor in a bench motor, allowing me to find where the bend was. Using a lathe, I turned a spare stop-arm into the bit I required. I then chucked the rotor into the bench motor and straightened the stem. Because of some other
issues in the casing, I had to then expand the hole in the casing so the spindle would fit through, then lap it to size.
Continuing with rotor repair, I began refitting the removable bearing plates. The last time they were fit, they were done so incorrectly. To correct this, I filed off the existing displacement, then burnished the plate to expand its diameter. After expanding plate properly, I then installed it into the casing.
After finishing mo rotor repair, I noticed that one of the solder joints going into the third casing from the branch was broken. Normally when there is a solder joint broken, we remove the two parts and clean them before soldering them back together. But because of the placement of the part, that would mean a lot of work. To clean these parts, I heated the tubes and put flux at the joint, boiling the flux. Our flux contains hydrochloric acid, which cleaned out the corrosion inside. I repeated this process a few times before adding more solder.
As assembly continued, I went about aligning the slides. During this process I found that some of the braces had become un-soldered. I re-soldered the braces as necessary and aligned the tubes.
The acids from our bodies making constant contact on metal tends to eat away at plating and finishes. Such is the case on these nickel-plated keys. Unfortunately, I did not have access to more nickel plating. To fix the issue, I buffed the keys and plated the tips of them with silver. Silver is not as durable as nickle plating, but it matches the color closer than bare brass. To better protect the keys, I will give them a light coating of lacquer.
One of the final issues that I have to fix is the replacement of the 4th lever. Unfortunately purchasing a new lever is not possible, so I must modify a different brand lever to act in its place. The first thing I did was create a new hinge rod for the lever. A piece of 3mm drill rod was threaded with a metric die, then cut to length and slotted. The modifications will resume next week. Hopefully, the horn will be complete in a day or two.


I began with repairing a bent rotor stem. To do this, I first made a bit to hold the rotor in a bench motor, allowing me to find where the bend was. Using a lathe, I turned a spare stop-arm into the bit I required. I then chucked the rotor into the bench motor and straightened the stem. Because of some other
issues in the casing, I had to then expand the hole in the casing so the spindle would fit through, then lap it to size.
Continuing with rotor repair, I began refitting the removable bearing plates. The last time they were fit, they were done so incorrectly. To correct this, I filed off the existing displacement, then burnished the plate to expand its diameter. After expanding plate properly, I then installed it into the casing.
All of the rotors had an issue with end-play. To fix this, I had to shim the long-spindle of the rotor. Doing so removed the end play, but also cause the caps to stop the rotors when tightened. To correct this, I had to grind the inside tip of the cap slightly to avoid the binding.
After finishing mo rotor repair, I noticed that one of the solder joints going into the third casing from the branch was broken. Normally when there is a solder joint broken, we remove the two parts and clean them before soldering them back together. But because of the placement of the part, that would mean a lot of work. To clean these parts, I heated the tubes and put flux at the joint, boiling the flux. Our flux contains hydrochloric acid, which cleaned out the corrosion inside. I repeated this process a few times before adding more solder.
As assembly continued, I went about aligning the slides. During this process I found that some of the braces had become un-soldered. I re-soldered the braces as necessary and aligned the tubes.
The acids from our bodies making constant contact on metal tends to eat away at plating and finishes. Such is the case on these nickel-plated keys. Unfortunately, I did not have access to more nickel plating. To fix the issue, I buffed the keys and plated the tips of them with silver. Silver is not as durable as nickle plating, but it matches the color closer than bare brass. To better protect the keys, I will give them a light coating of lacquer.
One of the final issues that I have to fix is the replacement of the 4th lever. Unfortunately purchasing a new lever is not possible, so I must modify a different brand lever to act in its place. The first thing I did was create a new hinge rod for the lever. A piece of 3mm drill rod was threaded with a metric die, then cut to length and slotted. The modifications will resume next week. Hopefully, the horn will be complete in a day or two.


No comments:
Post a Comment